Stainless Steel Hose Clamp Installation Guide: Avoid Leaks
A proper stainless steel hose clamp installation is the difference between a seal that lasts for years and one that weeps at the first pressure cycle. This DINSEN guide walks through every leakage-prone point — from model selection to pressure test — so your pipeline stays tight.
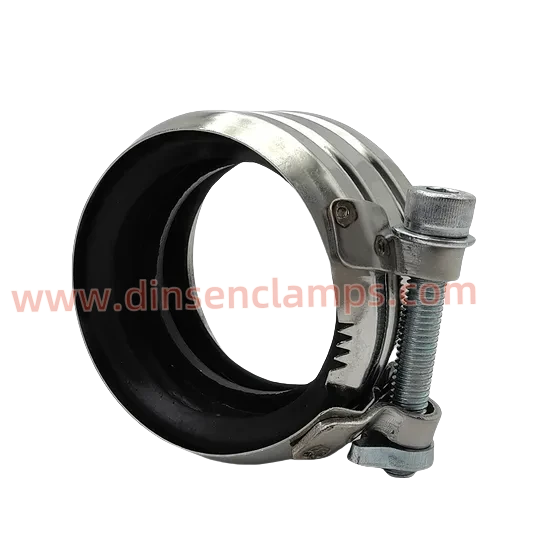
Stainless steel hose clamps are standard fasteners for hose connections across water supply & drainage, HVAC, automotive, construction machinery and chemical fluid transport. DINSEN supplies stainless steel worm-gear and T-bolt hose clamps in both 304 and 316 grades, compliant with DIN 3017 and ISO 9001. The tips below apply to all of them.
1. Choose the Right Hose Clamp (Model & Specification)
Before any assembly, confirm the clamp specification matches the hose outer diameter. The clamp's adjustable range must fully cover the assembled hose OD — never pick a product whose range is too small or too large.
- Too small: the band runs out of travel and cannot compress tightly.
- Too large: excessive band overlap causes extrusion deformation and uneven stress.
304 vs 316 stainless steel — which to choose? Select the grade by service environment. DINSEN offers both the table below helps you decide.
| Grade | Composition | Best for | Corrosion resistance |
|---|---|---|---|
| 304 | 18% Cr, 8% Ni | Normal atmosphere, fresh water, indoor & dry use | Good (general) |
| 316 | 304 + 2% Mo | Coastal, salt spray, marine, humid, mildly chemical | Excellent (pitting-resistant) |
2. Inspect Components Before Assembly
Check the appearance of clamps, hose and connector before formal assembly.
- Band, housing and screw: no deformation, cracks, burrs or rust.
- Threads engage smoothly; no stripped screw.
- Hose & fitting checklist
- Hose port: even cut, no cracks or aging damage.
- Metal connector surface: free of burrs and sharp edges (sharp edges cut the hose wall during tightening).
- Clean the assembly area — remove oil, sediment and oxide scale. Trapped impurities break the sealing surface even under high tightening force.
3. Confirm Hose Insertion Depth
When slipping the hose onto the connector, ensure sufficient insertion depth: the hose end face must reach the connector's limit step. Shallow sleeving is not allowed — under pull or medium pressure the hose can separate and eject fluid.
4. Tightening Steps & Torque Control
Tightening is the core step. Keep the clamp body fitted to the hose wall with the band straight (no tilt). Use a properly tool hose clamp or torque wrench and tighten slowly — avoid impact tools for rapid tightening.
- Seat the hose fully onto the connector stop shoulder; verify the mark.
- Position the clamp on the marked band area, away from the port edge and any bend.
- Fit the band square — no tilt, band straight around the hose.
- Tighten evenly with a torque wrench to the recommended value (see table).
- Verify the band: a small overlap margin remains; it is not tightened to the full adjustment limit.
Recommended torque reference
| Clamp type / band | Hose Ø range | Target torque |
|---|---|---|
| Worm-gear, 8 mm band | 13–32 mm | 2.5–3.5 N·m (22–31 in-lb) |
| Worm-gear, 12 mm band | 25–70 mm | 3.5–5 N·m (31–44 in-lb) |
| Worm-gear heavy-duty, 12 mm | 70–120 mm | 5–7 N·m (44–62 in-lb) |
| T-bolt clamp | large bore | 8–12 N·m (71–106 in-lb) |
Values are general references. For DINSEN's exact torque range by article number, request the technical datasheet.
5. Corrosion Protection & Vibration Environments
For outdoor, coastal and salt-spray service, inspect periodically even with stainless steel. At dissimilar-metal contacts the electrochemical corrosion risk is higher — add insulating gaskets if needed to isolate metals and slow corrosion.
On vibrating pipelines, vibration continuously acts on the clamp fastener and the screw can loosen over time. For such systems, check clamp tightness regularly and consider anti-loosening clamps where appropriate.
6. Pressure Test & Acceptance
After assembly, let the joint stand, then pressure-test. Raise pressure gradually in stages to the system design pressure and watch each clamp for leakage or slippage. If a leak appears, release pressure first, then re-tighten. Never tighten clamps under pressure.
After a passed test, keep installation records and follow the maintenance plan — check for seepage at seals, loose clamps, and hose aging or cracking to eliminate hidden dangers early.
7. Common Hose Clamp Installation Mistakes
- Reusing damaged or aged hoses.
- Installing the clamp at an angle (tilted band).
- One-time over-tightening.
- Placing multiple clamps too close — local hose stress superimposes.
- Clamping at a hose bend.
Frequently Asked Questions
1. What torque should I use for stainless steel hose clamps?
For standard worm-gear clamps, tighten to about 3.5–7 N·m (31–62 in-lb) depending on band width and hose diameter. T-bolt clamps may need 8–12 N·m. Always follow the DINSEN product datasheet — over-tightening crushes the hose, under-tightening leaks.
2. 304 or 316 stainless steel hose clamp — which should I choose?
Choose 304 for normal atmosphere and fresh-water use. Choose 316 (with added molybdenum) for coastal, salt-spray, marine, humid or mildly chemical environments where pitting corrosion resistance matters most.
3. Why does my hose clamp keep leaking?
Most leaks come from shallow hose insertion, a tilted band, wrong torque, sharp burrs on the hose end, dissimilar-metal (electrochemical) corrosion, or vibration loosening the screw over time.
4. How deep should the hose be inserted onto the fitting?
The hose end must reach the fitting's limit step (stop shoulder). Never leave a gap. After full seating, mark the clamp position and keep it away from the hose-port edge and any bend.
5. Can I tighten a hose clamp while the system is pressurized?
No. Always depressurize first. If a leak appears during a pressure test, release the pressure before any second tightening — never adjust clamps under pressure.
-
Rubber Gasket Materials for Pipe Couplings: EPDM, NBR, FKM and TPE ComparedখবরNov.05,2026
-
Day 4 at the 140th Canton FairখবরOct.26,2026
-
What Is a Characteristic of a Pipe Clamp? Key Features, Types & Buying GuideখবরOct.21,2026
-
Celebring China's National Day — Warmest Greetings from DINSENখবরOct.08,2026
-
Our Office Will Pause for the National Day WeekখবরSep.28,2026
-
Are Hose Clamps Stainless SteelখবরSep.22,2026
-
Invitation to the 140th Canton Fair 2026 DINSENখবরSep.15,2026